Welcome to the OT-90

Google | Ask | Yahoo
Russian Military Trucks Forum | Gallery | Downloads | Links | Shop
HMVF Forum | News | Articles | Shop
Group Messages | Album | Database
Red Alliance Forum | Gallery | Articles | Links
9th Company Forum | Wolfies Howls | Gallery | Events | Links
Armour Gallery | English Forum | Armour Video's
subglobal7 link | subglobal7 link | subglobal7 link | subglobal7 link | subglobal7 link | subglobal7 link | subglobal7 link
subglobal8 link | subglobal8 link | subglobal8 link | subglobal8 link | subglobal8 link | subglobal8 link | subglobal8 link

Internal Details

Czech Roundel
OT-90 Drivers view

The internals of the OT-90

This page deals with the internal arrangements of the OT-90. As you may think - the internals of any armoured vehicle do not allow much, if anything, in the way of space or creature comforts. It is truly said that Armoured Fighting Vehicles are as likely to kill their own crews as the enemy! Unlike the tanks of WW2 - or modern cars come to that the driver of an armoured vehicle has what looks like a bewildering array of controls and the Warsaw pact vehicles are probably the worst in this respect. Look at the picture to the left - the only thing not there in normal service is the small black TV screen below the right most vision block (added to comply with the UK's VOSA department). The same goes for the rest of the crew positions. Possibly the only one provided with any degree of comfort in the OT-90 is the gunner as he has a rally style seat with seatbelt and arm rests to travel in. Getting into that gunners seat, though, is a different story as we will see.

NOTE: If any image is too small to see the details clearly simply click on the image and a larger one will open for you to study at your leisure.

Complexity - or Simplicity?

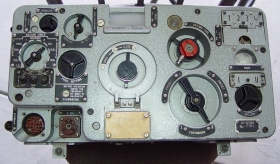
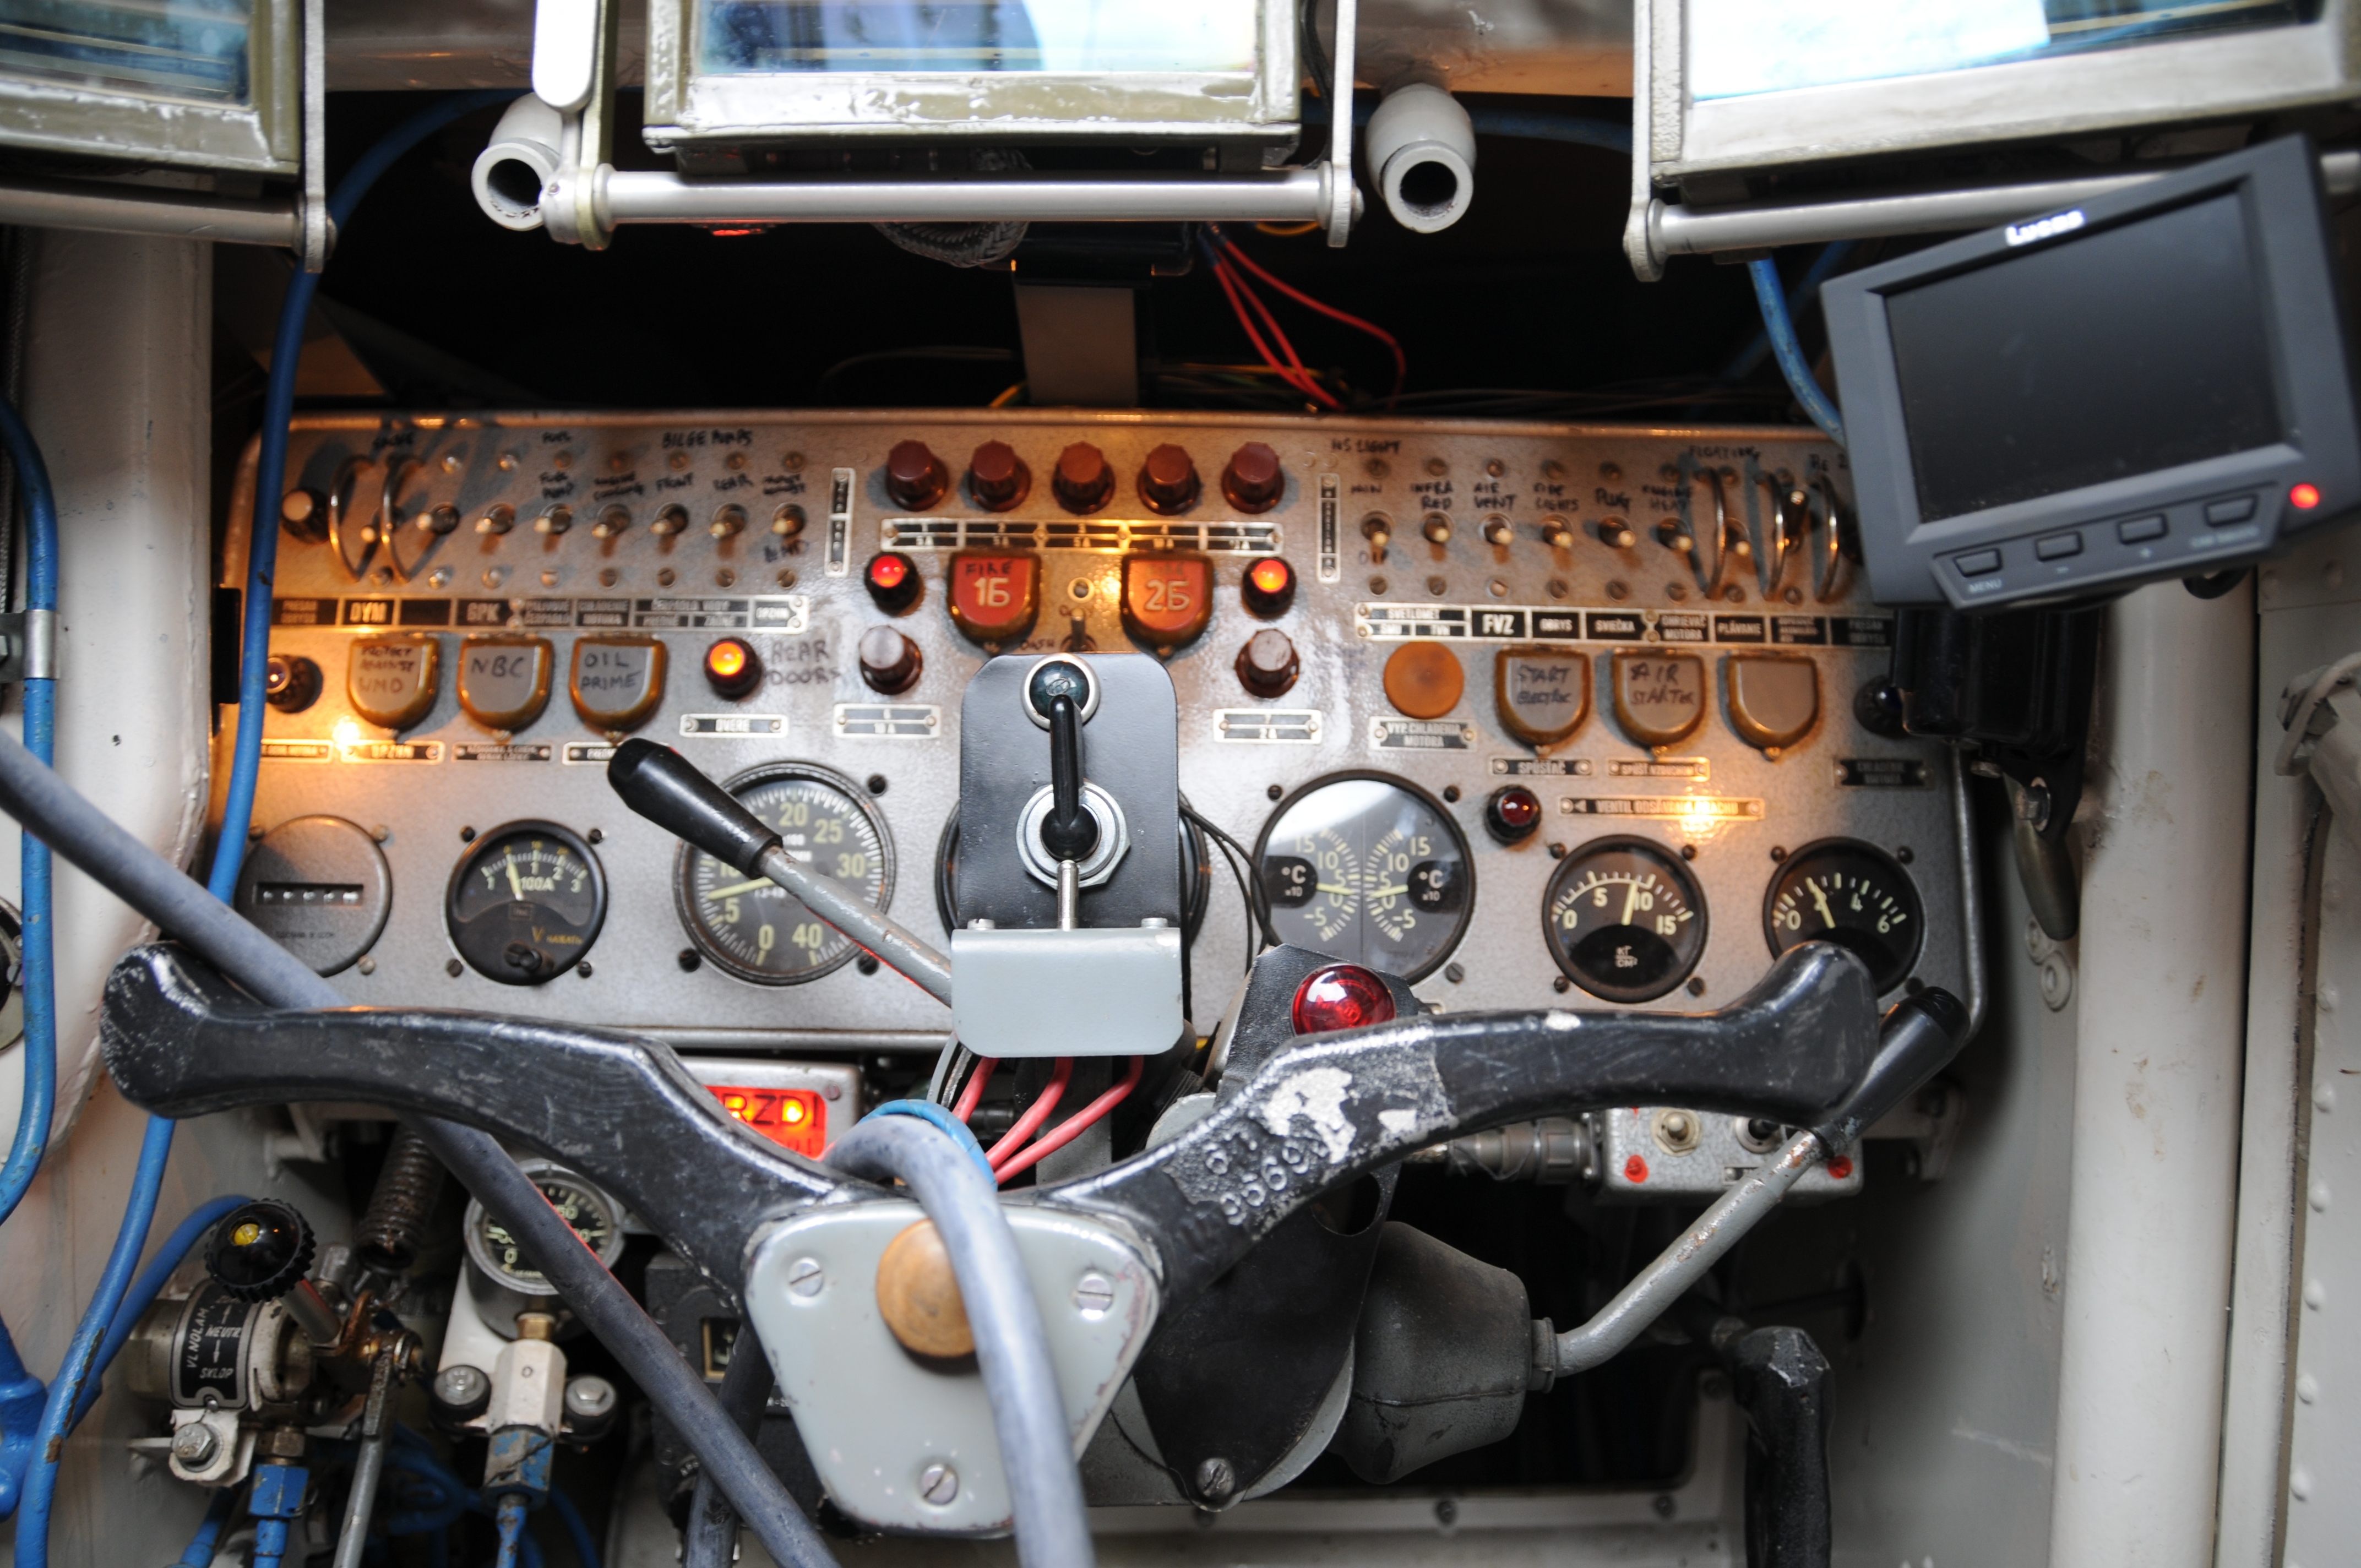
Let us start by looking at the forward most position in the vehicle - the drivers (where I spend my time!). For a fully detailed explanation of what the individual controls are for please refer to the instruction manual found in the "Related Documents"link to the left. For this section we will deal in generalities. Looking at the instrument panel it can be seen that the controls fall more or less into four primary groups:

Defense and Protection
NBC controls, smoke discharger controls etc.
Oil prime pumps and engine preheat controls
Fire suppression
Extinguisher controls and warnings. Door and hatch open warnings

Ancillary controls
Lighting (internal & external) main isolator, gyro compass and engine start buttons - air and electric
Engine instrumentation -
Rev Counter, Speedo, Temp Gauges,Ammeter, Hour meter

Immediately in front - and blocking the view of the Speedo in the picture above is the indicator switch and the High/Low transmission range selector.
Below and to the right is the gear lever - 5 forward speeds + reverse Use of the clutch is required when stopping and starting, however once the vehicle is moving the gears can be selected/changed up or down without using the clutch.
At the forefront of the picture is the tiller bar used to steer the vehicle - movement of this will affect the vehicle in different way depending on where the High/Low range selector is. If High is selected then the more the bar is pressed to one side or the other the tighter the vehicle will turn as track braking is progressive. If Low is selected then only hard turns - i.e. max braking on the inboard track are possible.
Below the High/Low selector is a rectangular red light - this is the handbrake warning light, It is possible to drive off with the handbrake still applied - at the risk of a serious fire in the engine bay. Below this again - and hidden by the tiller bar - is the gyro compass,
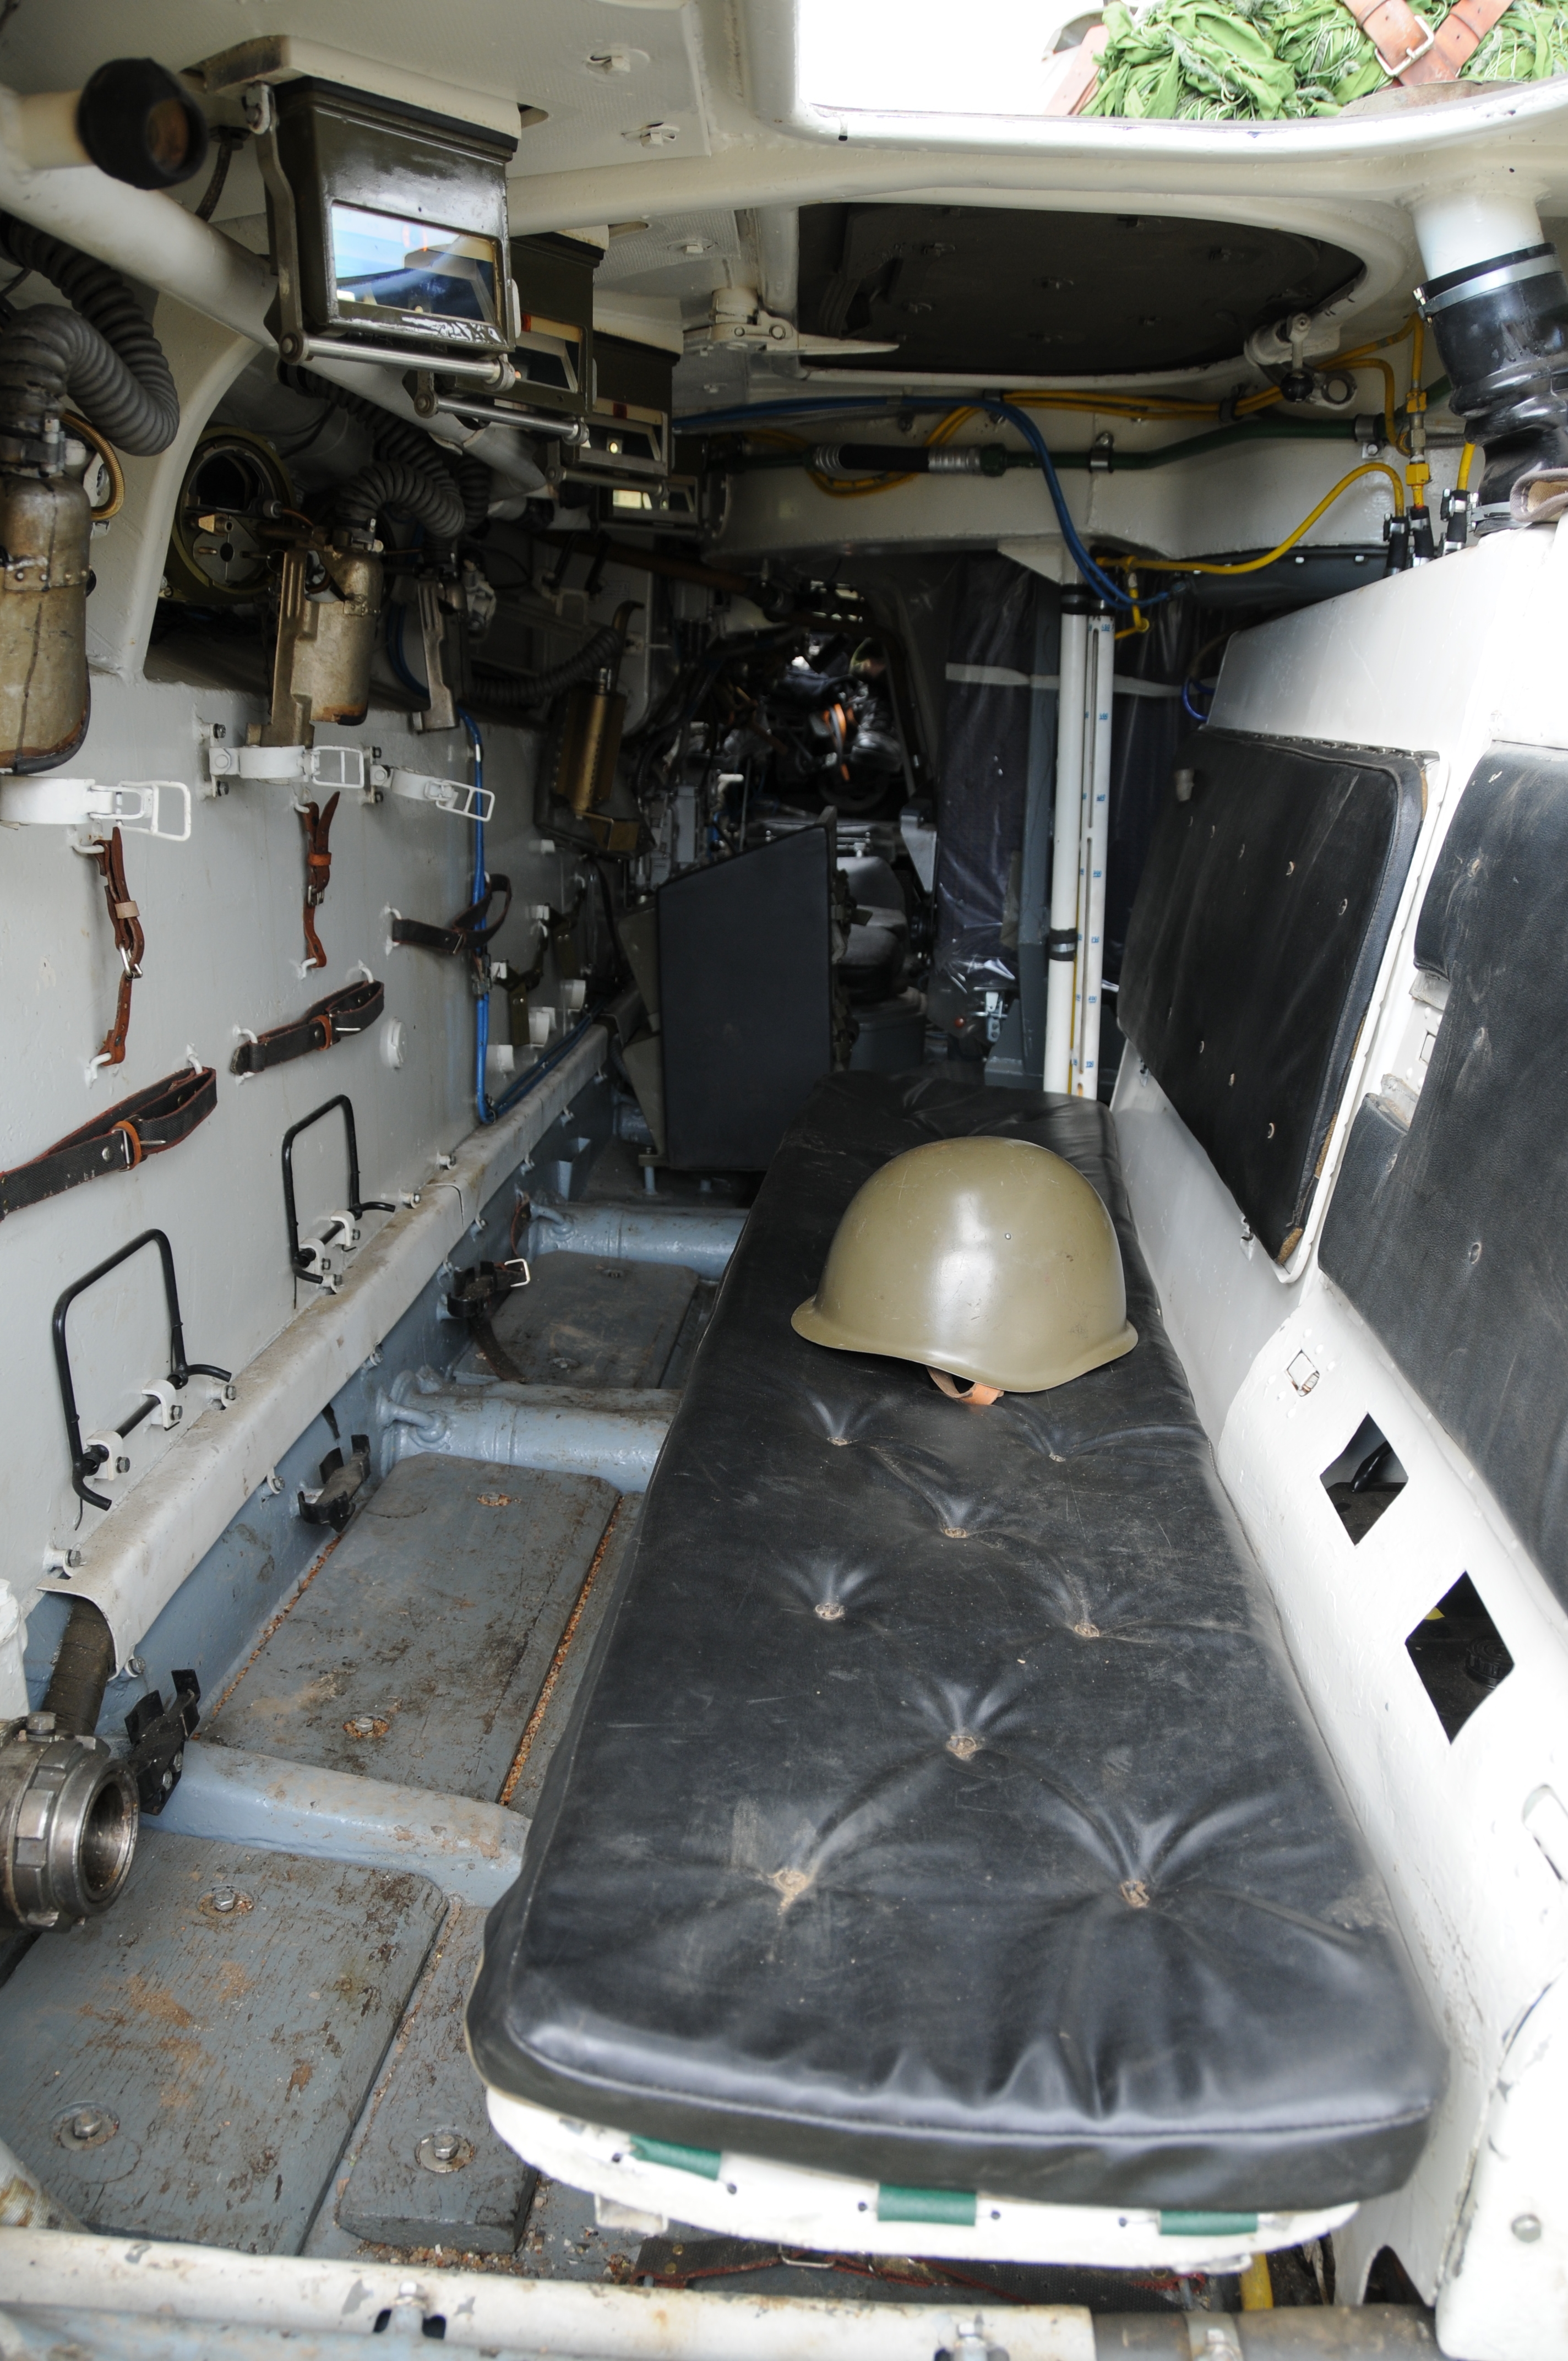
The lever at the lower right of the picture in the blue pipe work is the pneumatic control for raising the forwards swim vane and the snorkel behind the turret. Not visible to the right are the levers that shut the solid vent flaps over the inlets when used in an amphibious mode. Also hidden in this picture is the lever that swings the drivers hatch over and locks it into the closed position.
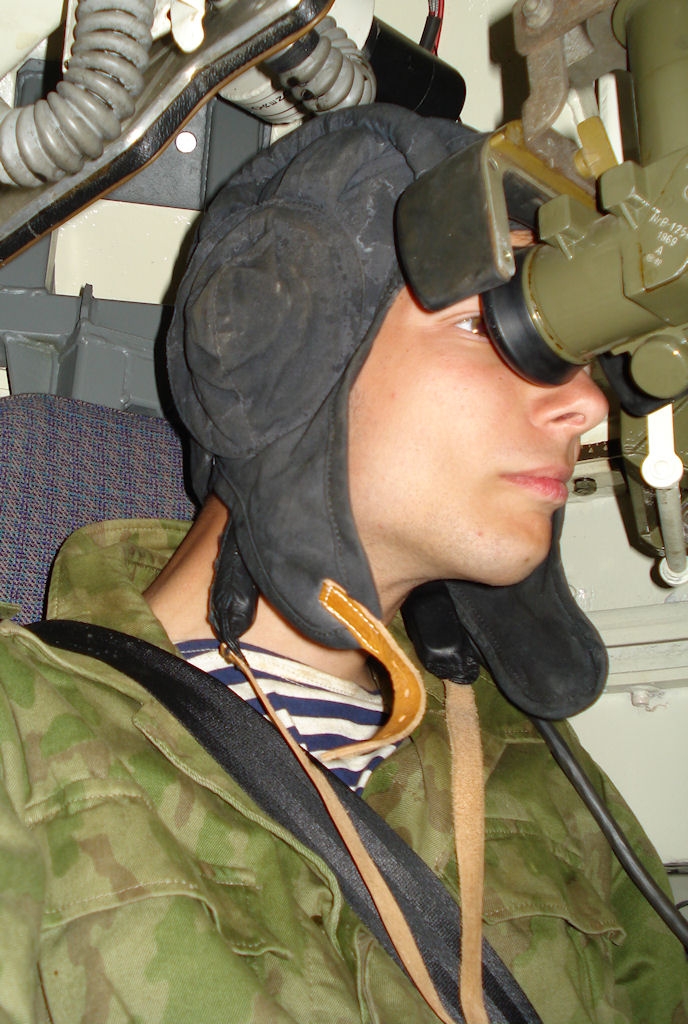
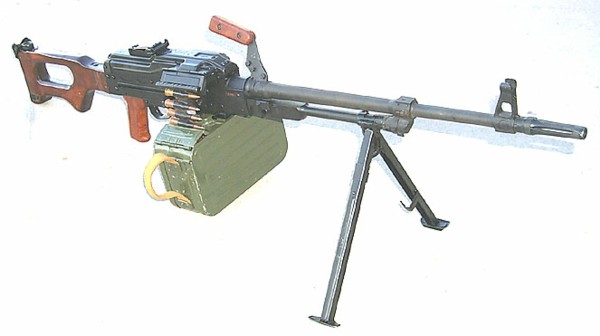
The grey lead hanging over the tiller bar is the fixed side of the intercom lead - the intercom is discussed below - which is secured by a screw-in plug at the junction box and had a "D" shaped quick release plug at the other end. The drivers hatch is a circular one approx 900mm in dia and swings over to ones side when open ,locking ito the open position. In action or when in amphibious mode the drivers seat base lowers rapidly so that the hatch can be shut and locked own. No provision is made for a personal weapon for the driver other than a pistol in a belt holster.

Commanders Position The commander sits immediately behind the driver and has their own access hatch. Unlike the drivers hatch which is a circular one the commanders is a half circle, albeit the same dia, with the infra-red spotlight and commanders periscope/sights mounted on the fixed half.The entire hatch can rotate through 270 degrees - the turret blocking the remaining 90 degrees. See the external detail page for a further explanation. Normally the commander stands on his seat so as to get a better view of the area whilst traveling however in action the set, like the drivers can be rapidly lowered so that the commander has room to sit inside the vehicle with the hatch closed. He is provided with a periscopic sight the has +/- 15 degrees of tilt and two standard vision blocks.

Commanders view inside the OT90

To the right and slightly to the rear of the commanders seat is the power control box for the turret - with this in the "Off position no internal lighting nor either of the firing circuits are active.
To the immediate left of the commanders seat is the standard Warsaw Pact vehicle radio set - the R-123

Temporary image pending one of the installed set

This sits under a canvas cover - a picture of the installed configuration is not yet available - and the control panel for the intercom is situated immediately below this and accessible by either the commander or driver. Click on the image for a technical description of the radio .There are only 5 intercom positions - driver, commander, gunner and seats 4 and 8 in the troop compartment beside the back doors. Below the radio set is a holster for a flare pistol and 3 cartridges

Immediately behind the commander is a storage space for boxed RPG rounds (5) for the RPG launcher held in the vehicle.

On the rear of both the commanders and drivers seats is a canvas bag for personal kit.


Return to top of page

Gunners Position As is obvious the gunner is located behind and to the right of the commander on the vehicle centre line. To access the gunners seat it is necessary to enter the vehicle through the R/H rear troop door and slide along the troop seat until the turret is reached. then drop to the hands and knees onto the turret floor whist working ones way up into the seat without knocking ones self out or losing the front teeth on the main weapons breech. Once in place the actual seat is comfortable and secure. There is no turret hatch as in the original BMP turret as the SKOT one is too small. From this, then, it can be seen that, in the vent of an emergency getting the hell out of there is neither a quick or easy task save that once out of the turret space the forward of the two roof hatches on that side of the troop compartment can be popped allowing egress that way.

Gunner seated in the OT-90


Note the crew helmet - unlike Western vehicles which are kevlar these are canvas with sewn-in rubber ribs, You can se the laryngaphones of the intercom hanging loosely on the long leather straps beside the gunners throat. The turret itself is non-powered so the gunner has two wheels adjacent to his left hand - on for traverse and one for elevation. To move the turret the motion locking pins need to be pulled back and secured in the fighting position before attempting to move either hand-wheel. The gunners right hand occupies the trigger grip - this has two buttons on it, L/H one is for the main gun and R/H for the coaxial mount. Both weapons are solenoid fired - they have no trigger of their own and cannot be used outside of the vehicle. An optical sight is provided for the gunner and which is situated to the left of the main gun.

View through the turet gun sight

To the right of the gunners seat are the ammunition trays for the 7.6mm coaxial weapon whilst to the left are the ammunition trays for the 14.5mm main gun. Actual storage capacity in rounds is, as yet, unknown.

Return to top of page

Troop compartment - seats 1 and 5 The front seat in the troop compartment on either side is allocated for the squad machine, the PKM and the internal mounts are configured for this weapon, The firing ports are angled forwards at approx. 30 degrees from the vehicle centre line and the muzzle collets are large enough to accommodate the heavier barrel of the PKM.

The PKM Squad machine gun

Below on the sides of the vehicles are six storage points for the distinctive squared magazines used by this weapon which can be seen in the picture above. As with the normal firing ports a fume extraction device is fitted on each position. These two ports have the addition of a spent cartridge case collector due to the increased rate of fire from these weapons as well as the normal heated vision block .

As yet no photograph is available of these firing ports - either as they are or with weapons mounted.

In front of the troopers seat there are straps for kit and and a fold down wire shelf for the back-pack to sit on and be secured whilst travelling in the vehicle. These are in front of every troopers seat, not just these two.

OT-90 troop compartment

Note the storage strap and the wire fold-down shelves on the side walls, Also the two vertical leather straps for the wood saw, part of the CES.

These are the arcs of fire covered by the fighting compartment ports:

Firing arcs

Return to top of page

Troop compartments - Seats 2 to 4 and 6 to 8 The remaining 6 ports in the rear troop compartment are conventional ones firing out at 90 degrees +/- 5 degrees in any plane and the muzzle collets are for the Vz-58, the Czech equivalent of the (in)famous AK-47.

Czech Vz-58 Assault Rifles

Note the lack of a cleaning rod under the barrel that an AK-47 would have. When not in use by the troops aboard they are stowed in storage racks beside each firing port.

Weapons stowed for travel

Note the silver cowls beside the muzzles - these are a combination of fume extractor and spent cartridge case deflector which send the ejected case down onto the floor - saves the trooper next door get a hot cartridge case in the face in combat. The lever to the left of the weapon in the foreground is the port opening mechanism.

Firing port in use

Here we see the firing port in action ( the weapon being used is a AK-47 hence the collet being absent). The vision block is free to gymbal around the axis for about 5 degrees and the opening mechanism can clearly be seen.


Return to top of page


Communications Unlike NATO vehicles the only positions, as stated, with access to the intercom other than the three primary crew members are the two rear most seats beside the access doors. These is so that the state of the doors can be monitored at all times - critical when entering amphibious mode as the doors need to wound in tight against their seals by means of the wheel seen in the photo below.

Rear view of the troop access doors

Soviet doctrine for amphibious operations called for a full speed approach into the water unlike the more conservative NATO doctrine of a slow entry and exit. Therefore anything that might be a source of water ingress is something to be monitored. In addition, whist engaged in combat should it be necessary to dismount from the vehicle the driver and/or commander needs to now everyone is back on board before moving off.,
Crew helmets, unlike the hard shell Kevlar ones used in the west are virtually unchanged since WW2. they are canvas with rubber strips sewn in forming "spines" over the head - simple yet effective and a good case of "if it ain't broke, don't fix it". Again unlike Western equipment boom mikes -which will pick up all background nose - are not used. Instead the helmets are fitted with laryngaphones on leather strap. When the strap are tightened pressing the mics against the throat a very clear sound is picked up allowing excellent communication in what is a VERy noisy environment . Likewise the ear coverings provide excellent insulation against external noise. Look at the photo of the gunner above.

Return to top of page

Additional equipment inside the vehicle NBC - protection for the occupants is provided by an over-pressure ai filtration system - air is drawn in through the NBC pack just behind the commanders hatch and fed into the interior of the vehicle by pumps. The pressure being high enough to counter the air voids around open fire points. It is not recommended to engage the NBC system if all the hatches and ports are closed if you value your ear drums!

Weapons - an RPG launcher is held on top of the central spine that houses the batteries and main fuel tank. In addition a sustained fore mount for one of the PKM's is secured at the front right of the vehicle behind the coaxial ammunition racks. Additional ammunition for the troops personal Vz-58's is secured on the floors under the troop seats.

C.E.S. (Central Equipment Schedule) - Some items of CES are carried within the vehicle. A wooding axe - like a Swedish logging ace - is stowed just inside the right rear door, A two handed wood saw is stored in front of the troops on the left side of the vehicles. Other CES is stowed externally.

First Aid Kits - A small one is stowed on the inner face of the left hand troop door and a larger one behind the gunners seat.

Troop Seats - The troop seats are normally in the low position as seen in the photo above. They can , however, be raised to another position for either maintenance access or for participation in parades. In the photo in the Communications section the four roof hatches can be seen in the open position and in parade mode the troops head and shoulders would be visible through these hatches.


Return to top of page

Contact Me | ©2010 Neil Plucknett